Hello Dolls!
I am often asked about how to make your own clip in extensions, so I've created a how to guide on the process. Now, anyone who knows me, knows my love of extra length. Clip In Extensions are a great way to get a quick change for an event, a wedding, or just a day you want to whip some extra hair back and forth.
First, start with quality human hair. There is no substitute for good hair. If you get synthetic or cheap hair, it will be awful looking and unnatural. I recommend spending spending $60 at minimum for a pack of hair. The best place to get hair is in the 'hood. Seriously. The quality for the price skyrockets the further away from the mall and sally's beauty supply you shop. So lock your car doors and head into the ghetto.
Also important, hair extensions always look better when curled or worn wavy. One of the reasons why celebrities very rarely wear their hair straight is because they are usually wearing extensions and they blend better when worn wavy/curly.
Items You Will Need:
- Good Quality Hair
- Sewing Needle
- Sewing Thread, match the color of your hair. Black is usually fine, brown is good too!
- Wig Clips. They are usually 2 for a $1.
Step 1- Buy your hair, and try and match it as close to your own color as possible. However, if you are like me, my hair is colored a very distinct red hue and I have to color my extensions to match. In this case, I buy the color that most closely resembles my own natural/starting color and go from there.
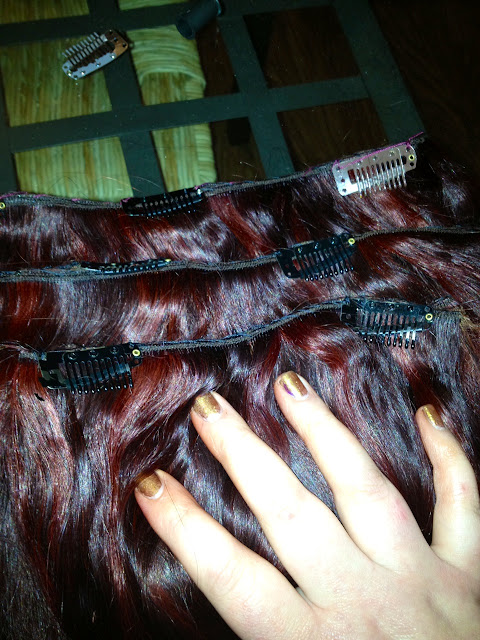
Pictured below are 16 inch FingerRoll by Milky Way. I prefer them, they are great quality human hair that already are wavy so they are much easier to style.
Step 2- Measure the extensions to your head shape. I prefer to place them lower on the head, so closer to the nap and midsection of the back of your head. Never place them too high in the crown, your own hair might not cover them! Personally, I wear 3 panels of hair. One at the nape, one in the midsection (right at the ears) and 1 right above my ears (the top section should be the widest of the 3).
Step 3- If you are going to color your extensions, you need to either visit your hairstylist or carefully pick the shade you use if you self color your hair. Be careful, you'd hate to ruin your new extensions with the wrong color. When in doubt, always pick a color a shade lighter. Remember to use a deposit only color, do not try and lighten your extensions. Lightly spray the extensions with water, as it helps the hair absorb the color better.
Step 4- Shampoo, Condition, and Dry your extensions. Put a little argan oil or heat protectant spray into them as well, to help protect the hair. This is human hair, treat it like you would your own!
Step 5- Start sewing your extensions together. I like to fold them over into sections of two, it makes the extensions a little thicker and you can fit more hair into a smaller space. This is especially recommended if you have thick hair. Use a simple needle and sewing thread and do a simple whip stitch to sew them together.
Step 6- Attach the clips evenly spaced along the panel of hair. Again, attach them with a simple whip stitch with a needle and thread.
Step 7- Place them in the desired sections on your head. Curl both your hair and the extensions together! Enjoy your new look!
Subscribe to:
Post Comments (Atom)


No comments:
Post a Comment